The Role of Vapor Barriers in Basement Waterproofing

Basements have a way of exposing every shortcut in a house. A wall can look dry for months, then a humid July arrives and the room smells musty by noon. A freshly finished space can seem tight and comfortable until the flooring cups, the baseboards stain, or a dehumidifier starts running like a second refrigerator. In many of those cases, bulk water is only part of the story. Water vapor, moving quietly through concrete and masonry, does just as much damage over time.
That is where vapor barriers enter the conversation. In Basement Waterproofing, they are often misunderstood, overpromised, or installed in the wrong place. Some homeowners hear the term and assume a sheet of plastic is a cure-all. Some contractors treat it like a box to check, even when the bigger moisture problem has not been addressed. The truth is more specific. A vapor barrier is a control layer. It helps manage the movement of moisture in vapor form. It does not stop liquid water under pressure. It does not fix poor drainage. It does not compensate for a crack that leaks during every heavy rain.
Used correctly, though, vapor barriers are one of the most practical tools in a basement moisture strategy. They protect finishes, help control humidity, reduce the chances of mold growth behind walls, and make a lower level feel less like a storage cave and more like conditioned living space.
Why basements are different from the rest of the house
A basement sits in constant contact with the ground. That fact changes everything. Above-grade walls get a chance to dry to the exterior. Basement walls do not. Concrete and block foundations are porous. They absorb and transmit moisture. Soil around the foundation holds water after rain and snowmelt. Even when no liquid water enters the basement, the materials themselves can remain damp enough to feed vapor migration.
This matters because moisture does not need to arrive in visible puddles to create problems. It can move through a concrete slab and raise the humidity in a finished room. It can pass through a masonry wall and condense behind a framed wall cavity. It can collect where cool surfaces meet humid indoor air, especially in summer. If you have ever walked into a basement that felt clammy despite no obvious leak, you have experienced the effect of moisture that is present but not dramatic.
I have seen basements where the owner swore the space was dry because they had never mopped up water. Then we pulled back a section of vinyl plank or opened the lower part of a finished wall and found black spotting on the paper facing, rusty fasteners, and a sour odor trapped in the insulation. The problem was not a flood. It was chronic vapor and elevated humidity.
What a vapor barrier actually does
A vapor barrier, more accurately called a vapor retarder in many assemblies, slows the movement of water vapor through a material or assembly. In basement work, it is commonly a polyethylene sheet, a dimpled membrane with sealed seams, or a foil-faced or specially coated product designed to resist vapor transmission.
Its role is narrow but important. It limits vapor diffusion from damp concrete or masonry into interior finishes and conditioned air. That helps preserve drywall, wood framing, flooring, insulation, and stored contents. It also supports comfort because dry materials and lower humidity simply feel better.
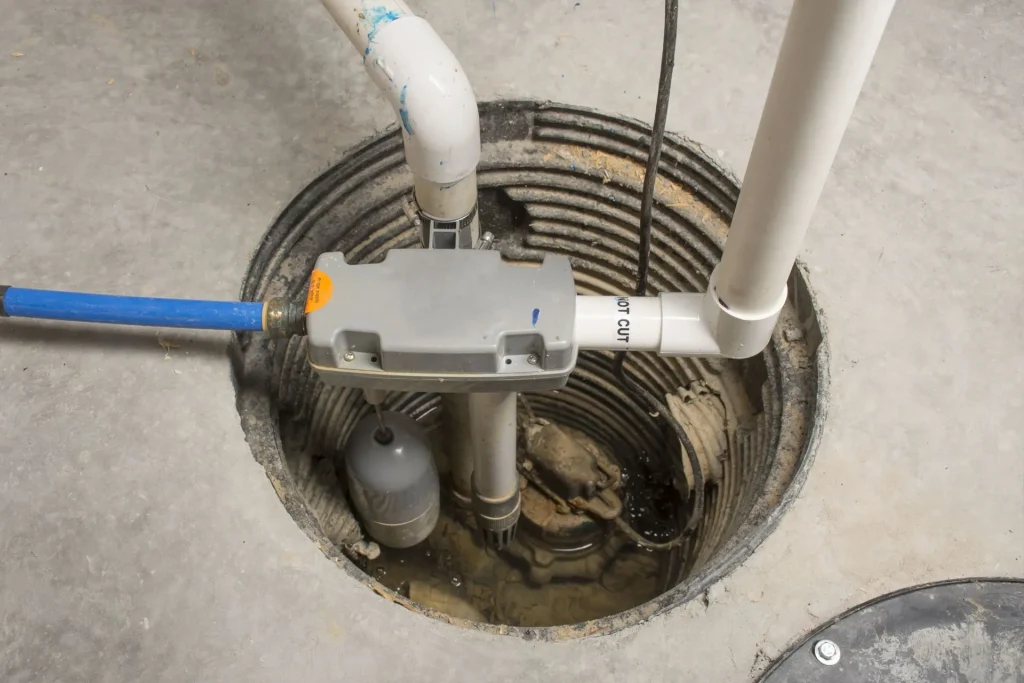
The crucial distinction is this: vapor barriers control vapor. Waterproofing systems control liquid water. A true Basement Waterproofing plan often includes exterior drainage improvements, crack repair, footing drains, sump systems, grading corrections, and interior drainage channels where needed. The vapor barrier fits into that larger system. It is not the system by itself.
That distinction is missed all the time. A basement wall that sees hydrostatic pressure from saturated soil may need exterior waterproofing or an interior drainage approach. If someone covers that wall with plastic and studs, the wall may still leak, and now the moisture is hidden. What looked like a neat finish job becomes a concealed decay problem.
The three moisture paths that shape basement performance
When I evaluate a basement, I think about moisture arriving in three forms. Each one needs a different response.
- Liquid water from leaks, seepage, or drainage failures
- Water vapor moving through concrete, block, or slab surfaces
- Humid indoor air condensing on cool surfaces
These paths overlap, but they are not interchangeable. A sump pump helps with collected groundwater. A dehumidifier helps with room air moisture. A vapor barrier helps reduce migration from the surrounding structure into the interior. Good results come from matching the fix to the path.
Where vapor barriers make the biggest difference
The slab is one of the most overlooked sources of moisture in a basement. Concrete looks solid, but it acts like a sponge and a wick. If there was no under-slab vapor barrier installed during original construction, or if it was damaged, moisture can continue rising through the slab for decades. That becomes a serious issue when a basement is finished with impermeable flooring. Luxury vinyl, sheet vinyl, rubber-backed carpet, and some adhesives can trap moisture at the surface. Then you get adhesive failure, odor, discoloration, or mold at the underlayment.
On walls, vapor barriers or vapor-resistant wall systems help keep interior finishes from sitting against a damp masonry surface. This is especially valuable in older homes with block foundations, where the wall can store a surprising amount of moisture after wet weather. Interior drainage membranes are often designed to create a capillary break and air space while directing any incidental water downward to a drainage channel. In that setup, the membrane is doing more than one job. It manages both water and vapor, provided the rest of the system is detailed correctly.
Crawl-space style reasoning sometimes gets applied badly to basements. People staple up plastic in one area because they heard it “stops moisture,” but do not seal seams, tie into the floor, or protect the assembly at transitions. Vapor control is only as good as continuity. Gaps around columns, rim joists, pipes, windows, and service penetrations can undermine the whole effort.
Interior versus exterior placement
Placement matters more than many people realize. In cold-climate above-grade walls, there is long-running debate about where vapor retarders belong. Basements add another layer of complexity because the wall is below grade and in direct contact with moist earth. That changes the drying potential.
On the exterior side, a proper waterproofing membrane applied to the foundation wall, combined with drainage board and footing drains, is ideal when the project scope allows excavation. It keeps bulk water away from the wall and reduces the amount of moisture the wall absorbs in the first place. This is often the best approach in new construction or major foundation rehabilitation.
On the interior side, vapor barriers and drainage membranes are more common because they are less disruptive and more affordable in existing homes. They can be very effective, but the design has to respect what the foundation is doing. If the wall is damp, you do not want absorbent finishes pressed directly against it. You want a layer that isolates interior materials, controls vapor, and provides a managed path for incidental moisture.
One common mistake is placing fiberglass batt insulation in a stud wall tight to a masonry foundation, then covering the room side with polyethylene. That can create a cold, damp cavity where moisture gets trapped with little drying potential. In practice, rigid foam or a basement-specific wall panel against the masonry usually performs better because it resists moisture and reduces the chance of hidden condensation.
Why “plastic on the wall” is not a universal answer
Homeowners often ask whether they can simply tape plastic sheeting to the basement wall before framing. The short answer is that this can help in limited cases, but it is not a reliable one-size-fits-all solution.
If the wall has active water entry, the plastic solves nothing. If the plastic is not integrated with the floor and perimeter, it can allow air and vapor to bypass the membrane. If wood framing touches damp concrete, capillary moisture can still move into the lumber. If seams are poorly detailed, the sheet becomes more decorative than functional.
There is also the issue of service life. Thin polyethylene can tear during installation or later when someone runs wiring, hangs shelving, or modifies the wall. More robust systems, including dimpled membranes or composite basement wall products, tend to hold up better because they create drainage space and are less prone to puncture damage.
That does not mean basic polyethylene has no place. Under slabs, beneath certain subfloor systems, or as part of a carefully designed wall assembly, it can work well. It just has to be used with intention, not hope.
The relationship between vapor barriers and indoor air quality
Basement https://israelxlwt614.brightpathdigest.com/posts/can-basement-waterproofing-increase-home-value air does not stay in the basement. A surprising amount of it migrates upward into the living area through stack effect, duct leakage, stair openings, and framing cavities. That is why a damp basement often shows up as a whole-house comfort problem. People notice a stale smell on the first floor, allergies seem worse, and the air conditioner struggles during humid weather.
A well-detailed vapor barrier helps by reducing one of the major moisture sources inside the home. When less vapor enters from the basement walls and slab, the dehumidifier or HVAC system has less work to do. Relative humidity becomes easier to control. Stored items stay in better condition. Finishes last longer.
This is especially noticeable in finished basements used as family rooms, offices, or guest rooms. In an unfinished utility basement, a little seasonal dampness may be tolerated. Once carpet, drywall, electronics, upholstered furniture, and closets move in, that tolerance disappears. The acceptable margin for moisture becomes much smaller.
I remember one job where the homeowner had replaced flooring twice in six years. They blamed the product both times. The real issue was a slab that was quietly emitting moisture into a nearly airtight finished room. Once the flooring came up, the concrete tested high for moisture, and there was no effective vapor control layer in the assembly. After addressing drainage, adding a subfloor system designed for basement conditions, and controlling slab moisture properly, the replacement floor held up.
How professionals decide whether a vapor barrier is needed
No responsible contractor should prescribe a vapor barrier without understanding how the basement is performing. That means looking at the whole moisture picture. Exterior grading, gutter discharge, foundation type, wall condition, interior humidity, HVAC setup, and planned finishes all matter.
A careful assessment often includes visual inspection, moisture meter readings on finishes and framing, humidity measurements, and sometimes more formal slab or wall moisture testing if flooring or a full finishing project is planned. The numbers do not need to be dramatic for action to be justified. Basements can fail slowly. A space sitting at 65 percent relative humidity much of the summer may never puddle, yet it can still support mold and material breakdown.
Here are the signs that often push vapor control higher on the priority list:
- Persistent musty odor without obvious standing water
- Efflorescence on foundation walls or slab surfaces
- Flooring failures, peeling paint, or damp wall finishes
- High basement humidity even with no plumbing leaks
- Plans to finish the basement with moisture-sensitive materials
Those clues do not automatically dictate one product, but they point to the need for a strategy rather than cosmetic fixes.
Vapor barriers under basement floors
Floor assemblies deserve special attention because they get less airflow and are easily trapped by finish materials. If a basement slab is allowed to release moisture directly into carpet pad, laminate underlayment, or wood-based materials, problems can appear surprisingly fast.
In new construction, the best practice is an intact under-slab vapor barrier installed before the concrete is poured. This cuts off a major source of moisture from below. In existing homes, you work with what is there. Sometimes that means using flooring adhesives rated for higher moisture conditions. Sometimes it means choosing an insulated subfloor panel that creates a small air gap. Sometimes it means avoiding materials that are too moisture-sensitive for that slab.
Epoxy and other topical coatings can serve as vapor-mitigating systems in some cases, but they are not universal answers. Surface preparation has to be exact. Existing contamination, cracks, or high moisture drive can cause failure. The right choice depends on the slab condition and the finished floor planned above it.
Basement walls, insulation, and trapped moisture
The finishing details around a vapor barrier are often where good intentions go wrong. A basement wall assembly has to control moisture, limit heat loss, and avoid creating a cavity that stays wet.
Rigid foam board against the foundation wall has become a common and sensible approach because it is less vulnerable to moisture than fiberglass. It also warms the interior surface, which reduces condensation risk. Sealed seams matter. So does keeping wood framing slightly off the masonry or isolated from it with appropriate breaks.
By contrast, traditional stud walls with fiberglass batts and polyethylene on the interior side can perform poorly in basements, particularly if the wall behind them is cool and damp. The assembly may look standard to someone used to above-grade construction, but below grade it often leads to moldy insulation and decaying bottom plates.
This is where product choice and climate judgment come in. A finished basement in Minnesota does not behave exactly like one in North Carolina. Soil moisture levels, air conditioning use, and seasonal humidity swings all affect the best assembly. Good contractors do not copy and paste details from another project. They adapt.
What vapor barriers cannot fix
This is the part many sales pitches skip. Vapor barriers are valuable, but their limits need to be stated plainly.
They cannot correct negative exterior grading that dumps roof runoff toward the house. They cannot replace a failed footing drain. They cannot stop water from entering through a structural crack under pressure. They cannot rescue a basement that lacks basic humidity control and ventilation planning. They also cannot make every finish material suitable for below-grade use.
If you cover an active problem without relieving it, the moisture usually finds a new path. It may show up higher on the wall, at the rim joist, beneath flooring, or inside a utility chase. Basement Waterproofing works best when the easy exterior fixes are handled first. Extensions on downspouts, proper slope away from the foundation, functional gutters, and surface water management often provide more value per dollar than people expect. Then vapor control can do its job in a more stable environment.
Cost, value, and when it pays off
Homeowners often ask whether vapor barriers are worth the extra cost in a basement project. In my view, they usually are, especially when the basement will be finished or used regularly. The cost of adding proper moisture control during a remodel is far less than the cost of tearing out wet flooring, replacing moldy drywall, and doing the job twice.
The financial case becomes stronger when you consider secondary effects. Lower humidity can reduce strain on mechanical systems. Materials last longer. Storage is safer. The room becomes more usable. If you are spending tens of thousands of dollars on a finished basement, skipping a few key moisture-control layers is the wrong place to save money.
That said, value depends on matching the system to the problem. Spending heavily on interior vapor control while ignoring obvious exterior drainage defects is wasteful. So is installing premium wall systems in a basement that remains chronically humid because no one planned for dehumidification. The smart approach is balanced, not maximalist.
A practical way to think about basement moisture control
The best basements are designed in layers. First, keep as much exterior water away from the foundation as possible. Second, manage any water that still reaches the wall or footing. Third, control vapor moving from the foundation materials into the interior. Fourth, condition the air so the space stays within a reasonable humidity range.
When those layers work together, a basement stops behaving like a damp underground shell and starts functioning like part of the house. Vapor barriers are a key piece of that layered approach. Not glamorous, not visible once the room is finished, but often decisive.
A dry-looking basement is not always a dry basement. Moisture can be present in slower, quieter forms that do not announce themselves until damage is underway. That is why experienced Basement Waterproofing work pays attention not only to leaks you can see, but also to vapor you cannot. The role of the vapor barrier is to close that gap, protecting the investment above it and the air people actually live in.
ARD Waterproofing
98 Smull Ave, West Caldwell, NJ 07006, United States
+1 917-691-8411
FAQ About Basement Waterproofing
Can you 100% Waterproof a Basement in West Caldwell?
A properly designed system can substantially reduce basement water intrusion, but no method can promise protection against every flood, equipment failure, or future change in site conditions. The first step is identifying whether moisture comes from surface runoff, groundwater, plumbing, or condensation. Solutions may include grading and gutter improvements, drainage, foundation repairs, and a sump system. Review the specific coverage and exclusions of any written warranty.
How much does it cost to professionally waterproof a basement in NJ?
There is no single price that fits every basement. Cost depends on the cause of the leak, the area needing work, access, excavation requirements, drainage design, sump equipment, and restoration of disturbed finishes or landscaping. Request an on-site assessment and an itemized written estimate that explains the scope, exclusions, and maintenance requirements before comparing proposals.
How long does foundation waterproofing last in West Caldwell, NJ?
Service life varies with the waterproofing materials, installation quality, soil and water conditions, and maintenance. Drainage components and pumps may require servicing or replacement even when other parts of the system remain functional. Keep gutters, drainage outlets, and sump equipment maintained, and have recurring leaks or changes in foundation condition assessed. Ask for product-specific expectations and written warranty terms rather than relying on one lifespan for the entire system.